|
|
|
|
|
How to add film burn effect in Adobe Premiere
Let me show you how to create that old school film burn transition effect in your video editing projects.
|
|
 |
|
|
|
|
|
|
|
|
|
|
 |
1.
|
|
|
You would most likely want to add the film burn effect between two clips (see picture).
Also recommended:
|
|
| |
2.
|
|
|
Click here to download the film burn effect and import it to your Premiere project (Ctrl + I).
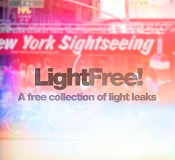
Right-click the link and choose Save As... to save the film burn to your computer.This film burn effect was made by Digital Cinema Foundry.Click the film burn clip you imported ... If you are experiencing trouble importing the clip, click here to download another film burn mp4 file created by DPCFilms.
|
|
| |
3.
|
|
|
... and drag it to timeline Video 2 (see picture).
It can of course be any other Video channel.
|
|
| |
4.
|
|
|
Zoom in your Timeline a bit if needed (see picture).
|
|
| |
5.
|
|
|
Now click the film burn clip.
|
|
| |
6.
|
|
|
Click the Effects Controls tab, open Opacity effect and choose Screen as a Blend Mode (see picture).
|
|
| |
7.
|
|
|
This is a screenshot from my project after the film burn applied.
|
|
| |
8.
|
|
|
I'm going to shorten the film burn clip a bit (see picture).
And that's it!
Click here to see how my short clip ended up.
And remember, there are a lot of different ways how to apply a film burn transitions, be creative and don't let anyone tell you there's only one and only correct way.
|
|
|
 |
|
 |
|
 |
|
|


 How to cut a video clip in Adobe Premiere
 Flash effect with Adobe Premiere